Welcome to our comprehensive guide on achieving perfect brows through tinting. If you’ve ever dreamt of having flawlessly shaped and beautifully tinted brows that look effortlessly natural, you’re in the right place. In this guide, we’ll walk you through the step-by-step process of brow shaping and tinting, as well as share expert tips and techniques to help you achieve your desired look.
Brow shaping and tinting have become essential in today’s beauty routine, as they can transform your entire face. By defining and enhancing your brows, you can frame your eyes and create a polished and put-together appearance. Whether you have sparse or unruly brows, tinting can help you achieve natural-looking and perfectly groomed arches.
In this guide, we’ll cover everything you need to know about achieving perfect brows, from understanding your natural brow shape and choosing the right tint to applying it like a pro and maintaining the results. We’ll also address common mistakes to avoid, provide tips for individuals with sensitive skin, and discuss how to adapt tinting techniques for different brow shapes.
So, if you’re ready to transform your brows and elevate your beauty routine, let’s dive into the world of brow shaping and tinting!
Key Takeaways:
- Brow shaping and tinting can help you achieve perfect, natural-looking brows.
- Understanding your natural brow shape is essential for a flawless result.
- Choosing the right brow tint based on your skin tone and hair color is crucial.
- The step-by-step process involves cleaning and priming your brows, applying the tint, and timing it correctly.
- After tinting, you can further enhance your brows with makeup and correct any imperfections.
Understanding the Basics of Brow Shaping
In order to achieve perfect brows, it is essential to understand the basics of brow shaping. This involves identifying your natural brow shape and using the right tools for grooming. By following these steps, you can enhance the overall look of your brows and achieve a polished appearance.
Identifying Your Natural Brow Shape
The first step in brow shaping is to identify your natural brow shape. Each person has a unique brow shape that complements their facial features. The three main brow shapes are:
- Arch: These brows have a pronounced arch just above the iris.
- Straight: These brows have minimal or no arch, extending horizontally.
- Rounded: These brows have a gentle curve without a defined arch.
Identifying your natural brow shape is important because it allows you to work with the existing structure and enhance it accordingly. It ensures that the final result looks harmonious and suits your face shape.
Tools You’ll Need for Perfect Brows
Having the right tools is crucial for achieving perfect brows. Here are the essential tools you’ll need:
- Tweezers: High-quality tweezers are necessary for precise hair removal. They help in shaping the brows and removing any unwanted hairs.
- Brow scissors: Brow scissors with curved tips are ideal for trimming long brow hairs and giving your brows a neat appearance.
- Spoolie brush: A spoolie brush is used to groom the brows and blend in any harsh lines or excess product.
With these tools in hand, you can effectively shape, groom, and maintain the perfect brows you desire.

| Tool | Description |
|---|---|
| Tweezers | High-quality tweezers for precise hair removal and shaping. |
| Brow scissors | Curved-tip scissors for trimming long brow hairs. |
| Spoolie brush | Brush to groom the brows and blend in any harsh lines or excess product. |
With a clear understanding of your natural brow shape and the right tools at your disposal, you are now ready to embark on the journey of achieving perfect brows.
Preparation: Before You Start Tinting
In order to achieve flawless and long-lasting tinted brows, proper preparation is key. Taking the time to prepare your brows and protect your skin will ensure the best results and minimize any potential staining. Here are the essential steps to follow before starting the brow tinting process:
Thoroughly Clean Your Brows: Before applying any tint, it’s important to clean your brows to remove any oils, dirt, or makeup residue. This will allow the tint to adhere more effectively and evenly. Use a gentle cleanser or a dedicated brow cleaning solution to ensure your brows are free from impurities.
Protect the Skin Around Your Brows: Brow tinting can result in accidental staining of the surrounding skin. To prevent this, it’s crucial to create a barrier between the tint and your skin. Apply a thin layer of petroleum jelly or a specialized barrier cream around your brows, ensuring that the tint does not come into contact with the skin.

Take Precautions for Skin Protection: It’s important to remember that the tinting process involves applying chemicals to your brows. To protect your skin from any potential irritation or adverse reactions, consider doing a patch test before tinting your brows. Apply a small amount of the tint mixture to an inconspicuous area of skin, such as behind your ear, and wait for 24 hours to check for any negative reactions.
By following these preparation steps, you’ll ensure that your brows are clean and ready for tinting, while also protecting your skin from any potential staining or irritation. Now that you’re ready to proceed, let’s dive into the next section, where we’ll explore the importance of choosing the right brow tint based on your skin tone and hair color.
The Importance of Choosing the Right Brow Tint
In order to achieve the perfect brow look, it is essential to choose the right brow tint. The color of your brow tint will greatly impact the overall appearance of your brows, so it’s crucial to select a shade that complements your skin tone and hair color. Furthermore, understanding the different tint formulas and brands available in the market will help you make an informed decision that best suits your needs and preferences.
Analysing Skin Tone and Hair Colour
When selecting a brow tint, it’s crucial to consider your skin tone and hair color. Analyzing your skin tone will help determine whether warmer or cooler undertones will harmonize best with your brows. If you have light hair, opting for a tint that is a shade or two darker can create natural-looking definition. On the other hand, those with darker hair may benefit from selecting a shade that matches their hair color more closely.
It’s also essential to consider your hair color when choosing a brow tint. Matching your brow tint to your hair color will create a cohesive and polished look. Additionally, you may want to take into account the undertones of your hair color to ensure a harmonious blend with your brows.
Understanding Tint Formulas and Brands
Tint formulas and brands vary in terms of their ingredients, longevity, and application techniques. It’s important to understand these differences in order to select the most suitable brow tint for your needs.
Some tint formulas may contain ingredients that are beneficial for the health of your brows, such as nourishing oils or vitamins. Others may have longer-lasting properties or be more resistant to smudging or fading. Considering these factors can help you make a well-informed decision.
Furthermore, exploring different tint brands will allow you to discover products known for their quality, reputation, and customer reviews. It’s always helpful to hear from others who have tried the product before making your final decision.
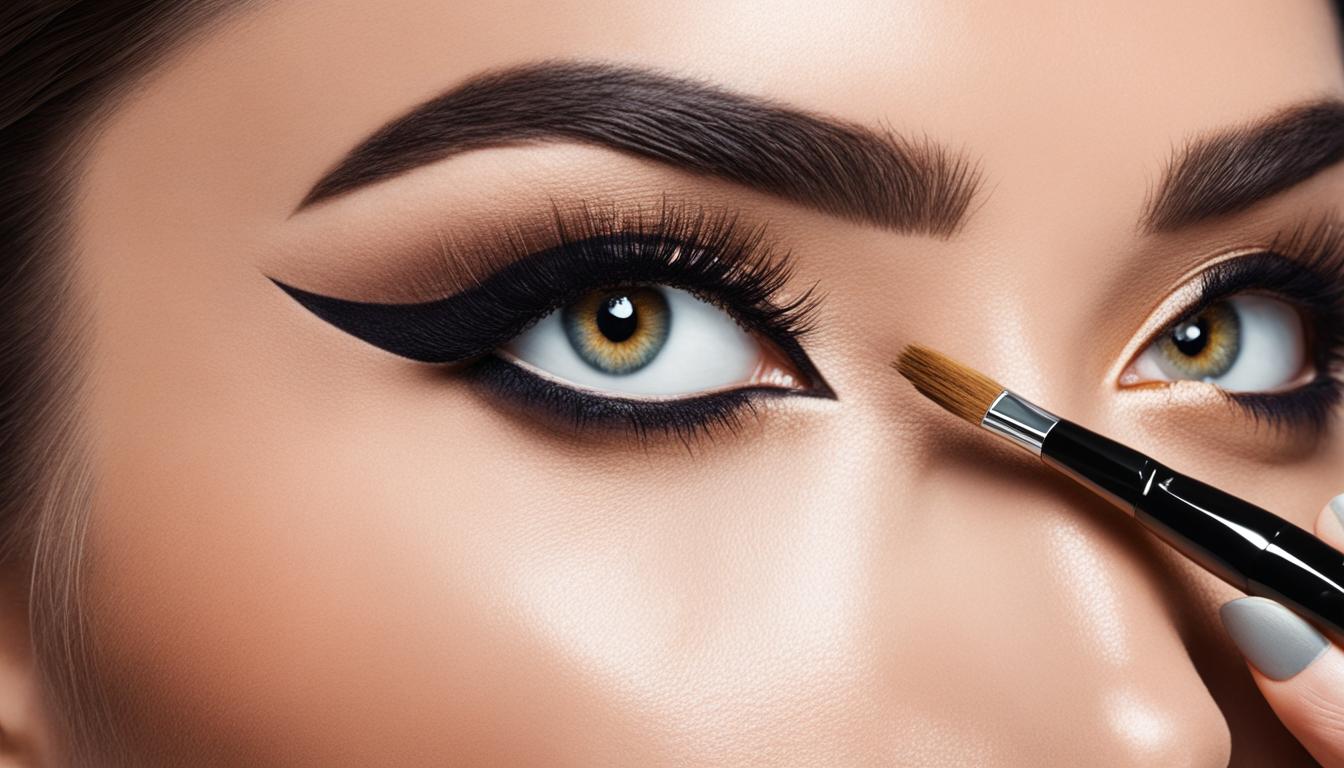
To visualize the importance of choosing the right brow tint, take a look at the image below:

Table: Comparing Different Brow Tint Formulas and Brands
| Tint Formula | Brand | Longevity | Application Technique |
|---|---|---|---|
| Nourishing | Brand A | 2-3 weeks | Brush-on |
| Water-resistant | Brand B | Up to 4 weeks | Drip application |
| Long-lasting | Brand C | 6-8 weeks | Gel application |
Step-by-Step Process: Как красить брови
In this section, we will guide you through the step-by-step process of achieving perfect brows through tinting. By following these techniques, you’ll be able to enhance your brow shape and create a beautiful, long-lasting tint.
Cleaning and Priming Your Brows for Tinting
Before you start the tinting process, it’s essential to ensure that your brows are clean and free from any makeup or oils. Use a gentle cleanser or makeup remover to thoroughly cleanse your brows.
Next, prepare your brows for tinting by applying a thin layer of petroleum jelly or a barrier cream around the brows. This will help protect your skin from any potential stains and make it easier to remove excess tint later on.
Applying the Tint Like a Pro
Once your brows are clean and prepped, it’s time to apply the tint. Start by mixing the tint according to the manufacturer’s instructions. Use a disposable brow brush or a clean mascara wand to apply the tint, starting from the inner corners and working your way outward.
Apply the tint in the direction of hair growth, ensuring that each hair is coated thoroughly. Be careful not to apply the tint too close to the skin to avoid staining the skin.
Leave the tint on for the recommended amount of time, which typically ranges from 5 to 15 minutes, depending on the brand and the desired intensity of the tint. Use a timer to ensure accuracy.
Timing Is Everything: How Long to Leave the Tint On
Timing plays a crucial role in achieving the perfect tint. Leaving the tint on for too long can result in overly dark brows, while removing it too early may lead to a lighter, less defined color.
Refer to the instructions provided by the tint manufacturer for the recommended processing time. Factors such as your natural hair color and desired intensity should also be considered when determining the ideal tinting time.
Remember to set a timer and closely monitor the tinting process to achieve the desired results. Once the time is up, gently remove the tint using a damp cotton pad or a clean spoolie brush.

Recommended Tinting Times for Different Brow Colors
| Brow Color | Recommended Tinting Time |
|---|---|
| Light Blonde | 5-7 minutes |
| Dark Blonde | 7-10 minutes |
| Light Brown | 10-12 minutes |
| Medium Brown | 12-15 minutes |
| Dark Brown | 15-20 minutes |
Remember to adjust the tinting time based on your personal preference and the desired intensity of the tint. It’s always better to start with a shorter tinting time and gradually increase it if needed.
Correcting and Perfecting Brow Shape Post-Tint
After tinting your brows, it’s important to correct and perfect their shape to enhance the overall result. Grooming and shaping the brows can help achieve a polished and defined look. Here are some helpful tips and corrective techniques:
Tweezing: Use tweezers to remove any stray hairs that might detract from the desired shape. Be careful and precise, plucking one hair at a time.
Trimming: If your brow hairs are long or unruly, you may want to trim them with small brow scissors. Trim carefully, following the natural shape of your arches.
Brow Gels or Waxes: To tame unruly brows and keep them in place, consider using a brow gel or wax. These products help shape and define the brows while providing a polished finish.

Remember, correcting and perfecting your brow shape post-tint is a personal process. Take your time, assess your brow’s natural shape, and groom accordingly. With practice and patience, you’ll be able to achieve beautifully shaped and tinted brows.
Finishing Touches: Filling in Gaps and Adding Definition
After tinting your brows to perfection, the final step is to add those finishing touches that will enhance your look. This involves filling in any gaps or sparse areas and creating definition for a natural brow appearance.
Choosing the Right Brow Pencil or Powder
To fill in gaps and achieve brow definition, it is important to select the right brow pencil or powder that matches your tinted brows. Choose a shade that complements your hair color and fills in any areas that need a little extra love. Whether you prefer a pencil for precise application or a powder for a softer look, opting for a product with a fine tip or a slim brush will allow you to create natural-looking strokes and control the intensity of the color. Look for formulas that are long-lasting and smudge-proof to ensure your brows stay put throughout the day.
Creating Hair-Like Strokes for Natural-Looking Brows
When filling in the brows, it is crucial to mimic the appearance of natural brow hairs for a seamless and realistic look. Using small, short strokes, gently apply the brow pencil or powder to the sparse areas, following the direction of hair growth. This technique will help you achieve a natural-looking brow look that blends seamlessly with the tinted areas. Remember to start with a light hand and gradually build up the intensity to avoid an overly harsh or drawn-on effect.
For an added touch of dimension, consider using a brow brush or spoolie to blend and soften the product, ensuring a natural and polished finish. This will help to distribute the color evenly and create a more natural appearance.
With these finishing touches, your brows will be perfected, with any gaps filled in and definition added for a flawless look. Now you’re ready to flaunt your natural-looking, beautifully tinted brows with confidence.
Mistakes to Avoid When Tinting Your Brows
When it comes to tinting your brows, it’s important to be aware of common mistakes that can result in less-than-desirable outcomes. By avoiding these mistakes, you can ensure a successful brow tinting experience and achieve the perfect look you desire.
Over-tinting and How to Avoid It
One of the most common tinting mistakes is over-tinting the brows. This occurs when the tint is left on for too long or when a shade that is too dark is chosen. Over-tinting can lead to overly harsh or unnatural-looking brows.
To avoid over-tinting, carefully follow the manufacturer’s instructions for the tinting product you are using. Be sure to time the tint accurately and remove it promptly once the desired shade is achieved. Additionally, when choosing a shade, opt for a color that is slightly lighter than your natural hair color for a more natural result.
Ensuring Symmetry Between Brows
Another mistake to watch out for is failing to achieve symmetry between your brows. Asymmetrical brows can create an unbalanced and unflattering appearance. To avoid this, take the time to carefully map out the shape and position of each brow before tinting.
Use a pencil or a ruler to create guidelines that align with the natural arch of your brow, ensuring that both brows are evenly shaped and positioned. Pay attention to the angles and length of each brow to create a balanced and symmetrical look.
Common Tinting Mistakes to Avoid
To summarize, when tinting your brows, be mindful of over-tinting by following instructions carefully and choosing a shade that is slightly lighter than your natural hair color. Additionally, take steps to ensure symmetry between your brows by mapping out their shape and position before tinting. By avoiding these common mistakes, you can achieve beautifully tinted brows that enhance your overall look.
Maintenance Tips for Long-Lasting Brow Tint
To ensure that your tinted brows look beautiful and vibrant for as long as possible, it’s essential to follow proper maintenance practices. By taking care of your tinted brows, you can extend their longevity and enjoy the flawless look you desire.
Here are some maintenance tips to keep your brows looking their best:
- Avoid excessive washing or scrubbing: Over-cleansing can cause the tint to fade faster. When washing your face, be gentle around the brow area and avoid using harsh cleansers.
- Protect from chlorine and sunlight: Chlorine and excessive exposure to sunlight can fade the tint faster. If you’re swimming in a chlorinated pool or spending a lot of time in the sun, consider protecting your brows with a waterproof brow gel or wearing a hat.
- Use nourishing brow serums or oils: Keeping your brow hair healthy and nourished can enhance the longevity of the tint. Look for brow serums or oils that contain beneficial ingredients like castor oil or vitamin E.
By following these maintenance tips, you can enjoy long-lasting tinted brows that beautifully frame your face. Taking care of your brows goes a long way in maintaining their appearance and ensuring that they remain a striking feature.
Adapting Brow Tinting Techniques for Different Brow Shapes
When it comes to achieving flawless brows, one size does not fit all. Different brow shapes require tailored tinting techniques to achieve the desired result. Whether you have arched, straight, or rounded brows, adapting your tinting methods to your unique brow shape is key to achieving balanced and natural-looking results.
Tailoring Tinting Methods to Your Unique Brow Shape
Each brow shape has its own unique characteristics and requires specific attention during the tinting process. By understanding your unique brow shape, you can adapt your tinting methods for the best outcome.
For arched brows, enhancing the arch with a slightly darker tint can help accentuate the shape. On the other hand, straight brows may benefit from a softer and more natural-looking tint to create definition. Rounded brows can be complemented with a tint that adds structure and lifts the appearance of the brow.
By tailoring the tinting method to your unique brow shape, you can enhance your natural features and achieve a more polished look.
Modifying Techniques for Sparse vs Full Brows
Brow thickness, or density, also plays a role in determining the tinting techniques to be used. Whether you have sparse or full brows, modifications can be made to ensure a balanced and natural result.
For sparse brows, a light tint can help fill in any gaps and create the appearance of fuller brows. It’s important to apply the tint with a light hand and focus on creating a natural look. On the other hand, if you have naturally full brows, a slightly darker tint can help define the shape and add depth. Be mindful of not over-tinting, as it can lead to an overly bold or unnatural appearance.
By considering the thickness of your brows and modifying your tinting techniques accordingly, you can achieve a harmonious look that complements your unique features.
| Brow Shape | Tinting Method |
|---|---|
| Arched Brows | Enhance the arch with a slightly darker tint for accentuation |
| Straight Brows | Use a softer and more natural-looking tint for definition |
| Rounded Brows | Complement with a tint that adds structure and lifts the brow appearance |
| Sparse Brows | Fill in gaps with a light tint for a fuller look |
| Full Brows | Define the shape with a slightly darker tint for added depth |
By understanding how to adapt brow tinting techniques for different brow shapes and thicknesses, you can personalize your tinting process and achieve the perfect brows that enhance your natural beauty.
Home Remedies: Natural Tints and Dyes for Brows
In addition to professional brow tinting services, there are natural alternatives that you can try at home to enhance your brows. These homemade solutions can provide a more organic and chemical-free option for achieving the desired tint and color. By using natural ingredients, such as henna, cocoa powder, or walnut powder, you can create your own brow tints and dyes.
Using Natural Ingredients for Brow Tinting
One popular natural ingredient for brow tinting is henna. Henna powder, derived from the leaves of the henna plant, can create beautiful reddish-brown tints for your brows. It is a safe and natural option that has been used for centuries in traditional beauty rituals. Simply mix henna powder with water to create a paste, apply it to your brows, and let it sit for a few hours before rinsing it off.
Another natural ingredient to consider for brow tinting is cocoa powder. This kitchen staple not only adds a rich chocolate flavor to your recipes but can also be used to darken and define your brows. By mixing cocoa powder with a little bit of coconut oil or Vaseline, you can create a DIY tint that matches your hair color and adds depth to your brows.
Walnut powder is another natural dye that can be used to tint your brows. It provides a dark brown color that is perfect for brunettes. Mix walnut powder with water or oil to create a smooth paste, then apply it to your brows for a natural-looking tint. Keep in mind that walnut powder can be more staining, so be careful when applying it and ensure it doesn’t come into contact with your skin.
DIY Brow Tint Recipes and How to Use Them
Here are a few DIY brow tint recipes that you can try using the natural ingredients mentioned above:
- For henna-based tint:
- Mix henna powder with water until it forms a paste.
- Apply the henna paste to your brows using a small brush or cotton swab.
- Leave it on for a few hours or overnight for a more intense color.
- Gently wash off the henna and admire your beautifully tinted brows.
- For cocoa powder-based tint:
- Mix cocoa powder with a small amount of coconut oil or Vaseline to create a paste.
- Apply the cocoa paste to your brows using a clean mascara wand or brow brush.
- Leave it on for about 30 minutes to allow the color to develop.
- Remove the cocoa paste by gently wiping it off with a damp cloth.
- For walnut powder-based tint:
- Mix walnut powder with water or oil until it forms a paste.
- Using a clean brush, apply the walnut paste to your brows.
- Leave it on for 15-20 minutes.
- Rinse off the paste, taking care to avoid contact with your skin.
Remember to perform a patch test before using any natural tint or dye on your brows to ensure you don’t have any adverse reactions. Additionally, it’s important to note that the results of these homemade tinting methods may vary depending on your natural brow color and individual hair growth. Experiment and find the recipe that works best for you.
Navigating Professional Brow Tinting Services
When it comes to achieving flawless brows, professional brow tinting services can be a game-changer. Whether you’re a beginner or simply prefer leaving it to the experts, opting for professional salon services can ensure that your brows are in capable hands. Here are some key tips to help you navigate the world of professional brow tinting:
1. Research reputable salons or brow technicians in your area. Look for reviews, recommendations, and portfolios of their work to ensure they have a track record of delivering high-quality results.
2. Prioritize brow tinting safety. When selecting a salon or technician, make sure they adhere to proper safety protocols. This includes using tested and approved tinting products, maintaining clean and sanitary workstations, and practicing proper hygiene throughout the process.
3. Consider pricing and value for money. While price shouldn’t be the sole determining factor, it’s essential to find a balance between quality and affordability. Compare prices and services offered by different salons to make an informed decision.
4. Inquire about aftercare instructions. A professional brow technician should provide you with detailed aftercare guidelines to ensure that your tinted brows stay in optimal condition. This may include avoiding certain activities or products immediately after the tinting process.
5. Understand what to expect during your appointment. Ask questions about the process, duration, and potential discomfort or sensations you may experience. Being informed and prepared will help you feel more comfortable during your appointment.
By following these tips, you can feel confident in your decision to opt for professional brow tinting services. Not only will you save time and effort, but you’ll also benefit from the expertise and precision of a trained professional. Sit back, relax, and let the professionals work their magic for brows that are on fleek!
Brow Tinting for Sensitive Skin: What You Need to Know
Tinting your brows can be a game-changer in achieving the perfect arches. However, for individuals with sensitive skin, it’s important to take extra precautions to avoid any adverse reactions. In this section, we will explore the specific considerations for tinting sensitive skin and provide helpful tips for a safe and successful tinting experience.
Choosing Hypoallergenic Tint Formulas
When you have sensitive skin, it’s crucial to select hypoallergenic tint formulas that are less likely to cause irritation. These formulas are specially designed to be gentle on the skin and minimize the risk of allergic reactions. Look for brands that offer hypoallergenic options, and check the product labels for any potential allergens or irritants. By choosing the right tint formula, you can enjoy beautiful brows without compromising your skin’s health.
How to Patch Test to Prevent Reactions
Patch testing is an essential step in tinting for sensitive skin. It helps identify potential allergic reactions before applying the tint to your entire brows. Here’s how to conduct a patch test:
- Cleanse a small area on your forearm or behind your ear.
- Apply a small amount of the tint to the cleansed area.
- Allow the tint to sit for the recommended time specified by the manufacturer.
- If any redness, itching, or irritation occurs, remove the tint immediately and rinse the area with water.
- If there are no adverse reactions after 24-48 hours, the tint is likely safe for use on your brows.
Remember, each person’s skin is different, so it’s important to perform a patch test even if you’ve used the product before. Be patient and allow enough time for the test to ensure accurate results.
By choosing hypoallergenic tint formulas and conducting patch tests, individuals with sensitive skin can enjoy the benefits of brow tinting without any unwanted complications. Take the necessary precautions, and soon you’ll be flaunting beautifully tinted brows that perfectly frame your face.
How to Accentuate Your Tinted Brows with Makeup
Once you’ve achieved the perfect tinted brows, it’s time to enhance them with makeup. By selecting the right makeup products and using highlighting techniques, you can take your brows to the next level of definition and beauty.
Selecting Makeup That Complements Your Brows
When choosing makeup for your tinted brows, it’s important to consider products that will complement the color and shape of your brows. Opt for brow gels, pomades, or powders that match or are slightly lighter than your tinted brows. This will help you achieve a natural-looking finish that seamlessly blends with your existing brow color.
For a subtle and groomed look, choose a brow gel that will add texture and hold your brow hairs in place. If you prefer a more defined and filled-in look, a brow pomade will give you precise control over shaping and shading your brows. Alternatively, a brow powder can be used to softly fill in sparse areas and create a natural gradient effect.
Highlighting Techniques to Enhance Brow Definition
Highlighting your brows is an effective technique to enhance their definition and create a polished look. This step will draw attention to the arch and lift the brow area, making your tinted brows stand out even more. There are two key areas to focus on when highlighting your brows:
- Below the Brow: Apply a highlighter or light eyeshadow directly below the brow, following its natural shape. This will create a subtle highlight that lifts and emphasizes the brow bone.
- Inner Corner: Add a touch of highlighter or light eyeshadow to the inner corner of your eyes, just above the bridge of your nose. This will open up your eyes and contribute to a fresh and awake appearance.
Remember to blend the highlighter gently for a seamless transition, ensuring that it enhances your brow shape without appearing harsh or overpowering.
| Makeup Products | Best for |
|---|---|
| Brow Gel | Groomed and natural-looking brows |
| Brow Pomade | Precise shaping and defined brows |
| Brow Powder | Softly filling in sparse areas and creating gradient effect |
By selecting the right makeup products and incorporating highlighting techniques, you can accentuate your tinted brows and achieve a flawless finish. Experiment with different shades and textures to find the perfect combination that suits your personal style and enhances the natural beauty of your brows.
Frequently Asked Questions About Brow Tinting
Here are some common questions and concerns related to brow tinting:
Q: How long does brow tinting last?
A: Brow tinting typically lasts between 4 to 6 weeks, depending on individual hair growth and maintenance.
Q: Are there any risks or side effects associated with brow tinting?
A: When performed correctly, brow tinting is generally safe. However, some individuals may experience temporary skin staining or allergic reactions to the tint. It is important to choose a reputable salon or technician and conduct a patch test prior to the treatment.
Q: What maintenance is required for tinted brows?
A: To maintain the longevity of tinted brows, it is recommended to avoid excessive washing, scrubbing, or exposure to chlorine or direct sunlight. Using nourishing brow serums or oils can also help keep the tinted brows healthy and vibrant.
Q: Can I tint my brows at home?
A: While it is possible to tint your brows at home, it is recommended to seek professional assistance, especially if you are new to the process. Professional technicians have the expertise and experience to ensure desirable and safe results.
Q: How can I ensure symmetry between my brows?
A: Achieving symmetrical brows can be challenging. It is helpful to follow the natural shape of your brows and use proper measuring techniques. Additionally, professionals can assist in creating balanced results through their expertise.
Q: Will tinting make my brows look darker or unnatural?
A: Brow tinting is meant to enhance the natural appearance of your brows, not make them look darker or unnatural. By choosing the right tint shade and following professional techniques, tinted brows can look natural and well-defined.
Conclusion
In conclusion, achieving perfect brows is all about mastering proper brow shaping and tinting techniques. Throughout this guide, we have explored the importance of identifying your natural brow shape, selecting the right brow tint, and following a step-by-step process for optimal results.
By cleaning and priming your brows before tinting, applying the tint like a pro, and timing it perfectly, you can achieve flawlessly tinted brows. Additionally, post-tinting brow shaping and filling in gaps can further enhance the overall look.
To maintain long-lasting brow tint, it is essential to follow proper maintenance tips and avoid common mistakes such as over-tinting or neglecting brow symmetry. With careful attention to detail and the use of high-quality products, you can enjoy perfect brows for an extended period.
Whether you choose to experiment with natural tinting remedies or seek professional brow tinting services, it is crucial to consider your unique brow shape and adapt techniques accordingly. By selecting makeup that complements your tinted brows, you can accentuate their beauty and create a polished look.
Now armed with the knowledge and techniques shared in this guide, it’s time to embrace your perfect brows journey. With patience, practice, and a touch of creativity, you can achieve the brows you’ve always desired. Take the next step and unlock your brow potential!
FAQ
How can I achieve perfect brows through tinting?
To achieve perfect brows through tinting, it is important to start with proper brow shaping and identification of your natural brow shape. You will also need essential tools such as tweezers, brow scissors, and spoolie brushes. Cleaning and priming your brows before tinting is crucial, as is choosing the right brow tint based on your skin tone and hair color. Follow a step-by-step process, including cleaning and priming, tint application, and timing. After tinting, correct and perfect your brow shape and fill in any gaps for added definition. Avoid common mistakes like over-tinting and aim for brow symmetry. Proper maintenance is key to long-lasting tinted brows, and you can adapt tinting techniques to different brow shapes. Additionally, explore natural tints and dyes as a DIY option or consider professional brow tinting services if desired. For individuals with sensitive skin, choose hypoallergenic tint formulas and conduct a patch test beforehand. Finally, learn how to accentuate tinted brows with makeup to create a polished look.
How long does brow tinting last?
The duration of brow tinting can vary depending on several factors, such as the tint formula used, individual hair growth cycle, and aftercare practices. On average, brow tinting can last for around four to six weeks. However, it is essential to note that the tint will gradually fade over time. To maintain the tinted look, it is recommended to avoid excessive washing or scrubbing of the brows and protect them from excessive exposure to sunlight or chlorine. Using nourishing brow serums or oils can also help keep the tinted brows healthy and vibrant for a longer period.
Are there any risks or side effects associated with brow tinting?
While brow tinting is generally considered safe, there are some potential risks or side effects to be aware of. Allergic reactions to the tint or other products used during the process are possible, especially for individuals with sensitive skin. To minimize the risk, it is essential to choose hypoallergenic tint formulas and conduct a patch test before applying the tint to the entire brow area. Additionally, if the tint is not applied correctly or left on for too long, it may result in over-tinting, causing a darker or unnatural look. It is crucial to follow the instructions carefully and seek professional assistance if needed.
How much does professional brow tinting cost?
The cost of professional brow tinting can vary depending on several factors, such as the salon or brow technician, location, and additional services included. On average, the cost of professional brow tinting can range from £15 to £30. Some salons may offer packages or discounts for multiple treatments or combined services. It is advisable to inquire about the pricing beforehand and choose a reputable salon or technician with a good track record to ensure a satisfactory experience.
Can I tint my brows at home without professional assistance?
Yes, it is possible to tint your brows at home without professional assistance. However, it is crucial to follow the proper techniques and safety precautions to achieve the desired results and avoid any potential risks. Make sure to choose a high-quality brow tint that suits your skin tone and hair color. Clean and prime your brows before tinting and follow the step-by-step process carefully. If you are unsure or inexperienced, consider seeking guidance from online tutorials or consulting with a professional before attempting to tint your brows at home.